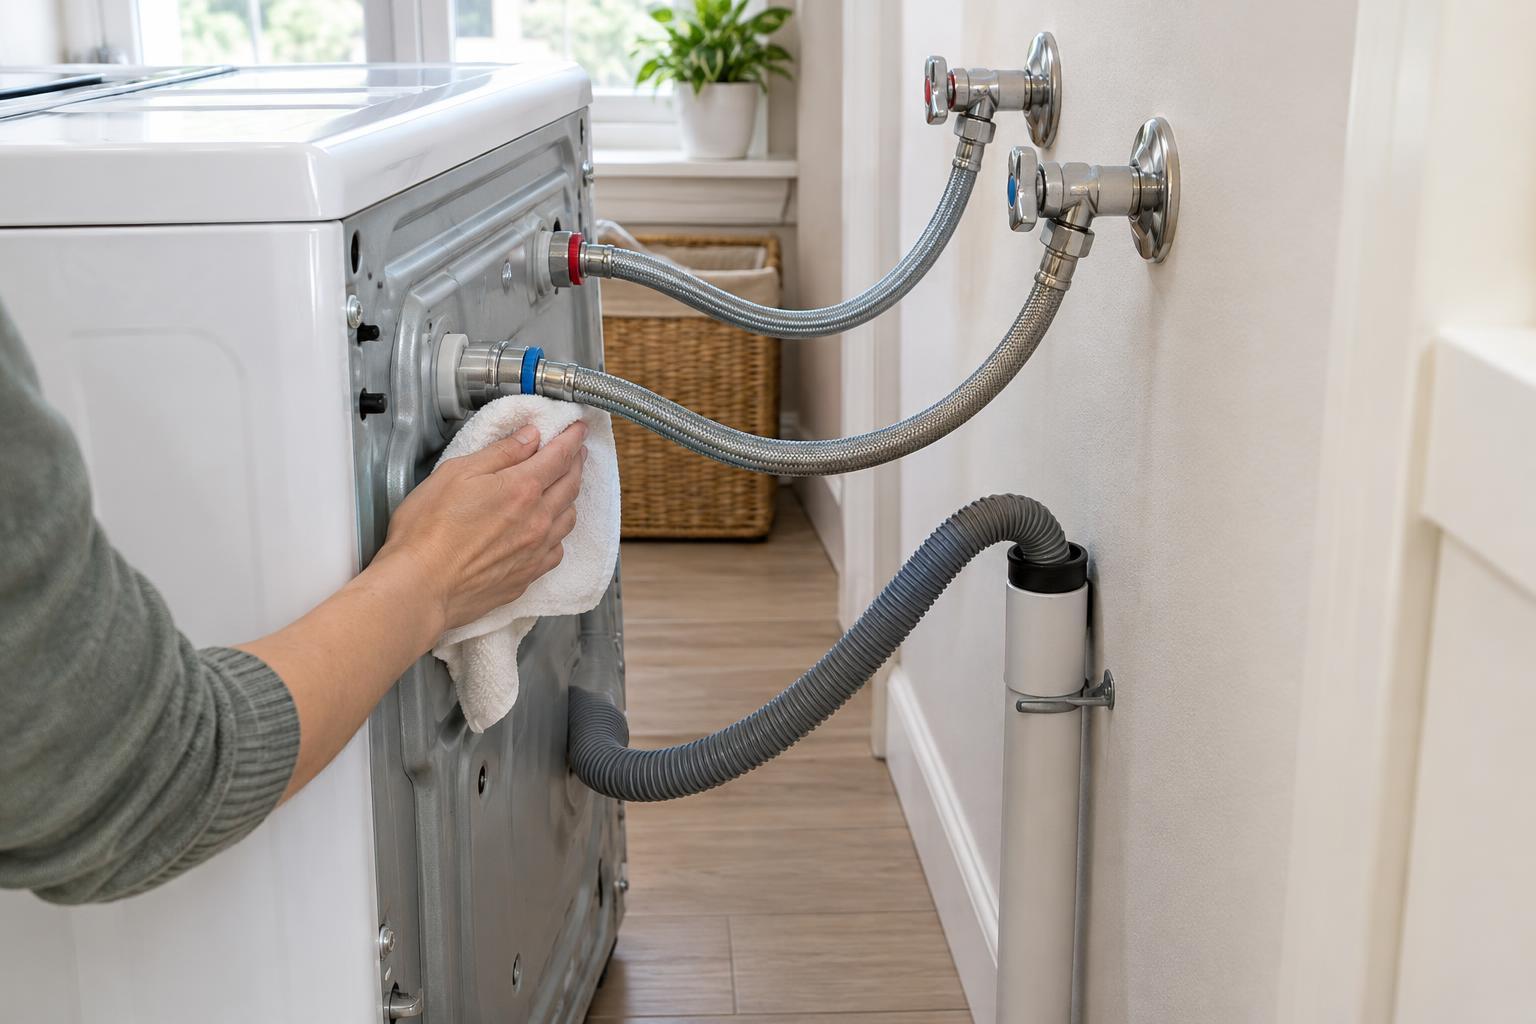
Know which hoses to check
A washing machine usually has two water-supply hoses: one for hot water and one for cold. They run from the wall valves to the back of the machine and remain under pressure whenever the valves are open. A separate drain hose carries used water to a standpipe, laundry sink, or other drain connection. All three deserve attention, but they can leak in different ways.
Supply hoses may drip at their threaded connections or develop damage along the hose itself. A drain hose is more likely to leak while the machine is emptying, particularly if it has shifted, cracked, or become loose at either end. Knowing which hose is which makes it easier to trace moisture and describe a problem if you need help.
Start with a safe, clear view
Inspect the area when the washer is off. If you need to reach behind it, unplug the machine first and move it only as far as you can without pulling on the hoses, drain line, or power cord. A heavy washer can be awkward to shift, so ask for help rather than forcing it. Keep the floor clear and use a flashlight to see the valves, connections, and space beneath the machine.
Look for fresh drops, water stains, rust, mineral deposits, or a musty smell. Feel the floor near the wall and under the accessible edges of the washer for dampness. A dry floor does not rule out a slow leak: water may run down the wall or collect behind the appliance where it is hard to see. If you find active leaking, close the supply valves if you can reach them safely and address the source before running another load.
Check the supply hoses from end to end
Follow each supply hose from the wall valve to the washer inlet. Look for cracks, blisters, bulges, fraying, sharp bends, or places where the hose is pinched against the wall. Check around both threaded connections for moisture and discoloration. A connection that appears dry while the washer is idle may still drip during a cycle, so it is worth checking again after the machine has run.
Do not assume a metal-braided hose is leakproof. Its outer braid can make some wear less obvious, while the fittings and inner hose still need inspection. If a hose is damaged, replace it rather than covering the spot with tape. Follow the washer and hose manufacturers’ instructions for selecting and fitting a replacement; the correct size and properly seated washers matter. If a connection leaks after installation, avoid repeatedly tightening it with force, which can damage fittings. Turn off the water and get help if you cannot identify the cause.
Include the drain hose and the space around it
Check that the drain hose is not cracked, crushed, or rubbing against a sharp edge. It should remain securely positioned where it empties, with enough slack that washer movement will not pull it free. Follow the machine’s installation guidance for drain-hose placement rather than pushing the hose farther into a standpipe to make it seem secure.
Pay attention to when moisture appears. Water found only during draining may point toward the drain hose or drain connection, though a blocked household drain can also cause an overflow. If you cannot see the source, stop using the washer until the problem is identified. Drying the area and watching a subsequent cycle can help locate a minor drip, but do not run another cycle if water is reaching electrical connections or pooling on the floor.
Make inspection part of a simple routine
Give the hoses a visual check whenever you clean around the washer, and take a closer look after moving the appliance. Leave enough space behind the machine to avoid kinking the lines, and keep stored items from pressing on them. Make sure household members know where the supply valves are so the water can be shut off promptly if a hose fails.
For added protection, a water-leak alarm near the washer may warn you about moisture that is otherwise hidden. It does not replace sound hoses or regular checks, but it can provide another chance to catch a problem early. If valves are stuck, fittings are corroded, or the machine is difficult to access safely, arrange for a qualified person to inspect the setup. A few minutes of attention can help keep a routine laundry day from turning into a cleanup project.


